Pages

Wednesday 25 July 2018


I've sealed this box so there is no peeking until 25th December 2018!

Heartfelt creations stamps and dies you will need:-
HCDP1-292 O Holy Night Collection paper pad
HCD1-7163 Gifts of Love Box
HCPC-3833 Silent night Scroll stamp set
HCD1-7186 Silent night Scroll die set
HCD1-745 Luggage and Tags die set
HCST1-401 Delux Flower Shaping kit

Other Stuff you will need:-
Cherry Cobbler ink and card stock (stampin up!), Green gross grain ribbon, multicolour glitter glue, nuvo crystal drops (bright gold), copic pens:- E55, E57, E59, YG67, YG97, hot glue, wet glue, black memento ink, thin paint brush

Die cut 4 box sides in Cherry Cobbler cardstock and burnish the folds. Join the box sides together using wet glue. Fold the bottom flaps of the box under and glue into position.

Cut 4 each of the corresponding panels out of your choice from the paper pad and edge with cherry cobbler ink. Adhere to the box using wet glue. Cut and add an additional square to the bottom of the box.

Add a strip of green ribbon to the top and bottom of the box using a thin layer of hot glue.

Make the pine cones:- Stamp 8 cones in black ink and colour using the copic pens. Die cut and shape using the flower shaping kit. Paint glitter glue onto the pine needles and set aside to dry.

When dry, add pine cones to the box using hot glue – 2 on each side and dot gold crystal drops to the side of them.


Make the bow:- cut 4 x  .5” x 6” strips of paper from the pad and 4 strips .5” x 4.75”, join each one at both ends using wet glue to make a circle of paper. Put a dot of wet glue inside the circle and press the centre onto the glue to give you a loop either end. Glue these loops to cross over each other, starting with the largest loops. When all eight are adhered add a small circle loop to the centre.


Put your present inside the box and fold the flaps in. Die cut the “merry Christmas” tag from the paper pad  and shape to curl across the front of the box, adhere to the box with together with the paper box using hot glue (THIS WILL PREVENT SNEEK PEEKS BEFORE THE 25TH !)

If you need the Gift of Love Box Die, click HERE
Thank you for visiting me today.
X

Wednesday 18 July 2018


These  papers from  HEARTFELT CREATIONS are beautiful.

YOU WILL NEED:-
HCDP1-292 O Holy Night Collection paper pad
HCD1-776 Eyelet oval die set
HCPC-3834 Noel Sentiments stamp set
HCPC-3833 Silent night Scroll stamp set
HCD1-7186 Silent night Scroll die set
HCST1-401 Delux Flower Shaping kit

AND:-White card, versamark, white embossing powder, transparent glitter, quickie glue pen, green organza ribbon, kuretake pens 048 Emerald green & 060 brown, diamond stickles, hot glue gun, double sided tape, foam pads,  diamond stickles

THIS IS HOW I MADE IT:-
Score an 8” x 16” piece of white card at 8” to create an 8” square card base.

Select the paper from the pad and cut a 7.5” square. Using a paper trimmer cut a square from the centre of the paper measuring slightly less than 6.5” mount this onto a piece of white card slightly bigger than 6.5”. Add the larger frame of paper to the base card. Adhere the paper mounted on the white card on top of the frame ensuring that the pattern matches both layers.

Run the quickie glue pen around the edge of the papers and add transparent glitter. Remove excess.


Stamp the sentiment in veramark onto co ordinating paper (aim to stamp it where it is free from pattern so that the sentiment shows up). Add white embossing powder and heat to set. Die cut this using the largest eyelet oval. Cut the eyelets off the oval.


Die cut a white  eyelet oval and cut the centre using the smaller oval to make a frame. Edge the frame with transparent glitter. Adhere the white oval from the centre to the back of the sentiment and the frame over the front of the sentiment and add to the base card using foam pads.
Make a bow and add to the side of the frame using hot glue.
Stamp the pine cone in versamark onto white card and heat emboss using white embossing powder. Colour using the kuretake pens and add diamond stickles to the pine needles. Shape using the Delux flower shaping kit and add to the centre of the ribbon using hot glue.

TAA - DAAAAA!
Thank you for dropping by. You can get the paper pad HERE
X

Wednesday 11 July 2018


Celebrate and create inspirational Christmas greetings that spread the true meaning of the holiday season with the O Holy Night Collection from Heartfelt Creations! Immerse yourself in the Christmas story right alongside the angels who announced the Savior’s birth, the shepherds who received the good news, as well as the loving family who welcomed the holy babe in Bethlehem so many years ago! Swaddled in a traditional color palette of reds and greens mingled with hues of midnight blues, golden starlight yellows and snowy whites, this festive paper collection has been beautifully wrapped with tender lace like details, charming plaids, flowing swirls, and elegant brocades all nestled among pretty poinsettias, delicate snowflakes, fanciful Christmas ornaments and gentle images depicting that holy night when Christ was born! Three exquisite cling stamp sets along with coordinating dies provide wonderful options for creating dimensional nativity scenes, holiday themed accents such as an old fashioned scroll, a pinecone with greenery, as well as an assortment of beautifully scripted Christmas sentiments in a variety of styles perfect for all of your holiday card making! The substantially sized and intricately detailed ornament die is magnificent for creating wonderful focal point images on card fronts, stunning accents on scrapbook layouts, or for creating ornament shaped cards ready to deliver your Christmas greetings to friends and loved ones! So pause, reflect and spread the message of God’s love given that holy night so many thousands of years ago as you create and send off holiday wishes with the O Holy Night Collection
O Holy Night I Want It All


The ingredients for this are
HCST1 – 401   Deluxe Flower Shaping Kit
HCD1 – 7188  Noel Ornament Die
HCPC – 3832  O Holy Night Stamp set
HCD1 7187  O Holy Night Die Set
HCPC – 3834   Noel Sentiments Stamp Set
HCDP1 – 292    O Holy Night Paper Pad
and. . . . . . .
White card, Navy Card, Stampin up night of navy ink, Black memento, Gold glitter, Red embossing pearl powder, White twinkle Wow embossing powder, Clear embossing powder, Diamond Stickles, Embossing paste, Hunkydory o holy night stencil, Kuretake pens – 034 dull blue, 036 light blue,071 flesh, 050 yellow, 051 lemon, 028 pale pink, 026 light pink, versamark, Gold gel pen, White bakers twine, Foam pads, Hot glue, Wet glue


Score a 12” x 6”  piece of white card in the centre to give a 6” square card base.

Cut a 5.75” square piece of navy card and adhere to the card base.

Select paper from the pad, cut to 5.5” square, ink the edges with night of navy ink and adhere to the card base. Use the stencil and embossing paste to create a raised star and cover with gold glitter – allow to dry and remove the excess.

Die cut the largest ornament in navy card stock. Die cut the second largest ornament in co-ordinating paper, ink the edges in night of navy ink and adhere onto the navy ornament. Tie a bow around the top of the ornament with bakers twine and adhere to the card base using foam pads.


Die cut the holy swirls and banner in white card and stamp the sentiment in navy ink, cover with embossing pearl powder, remove excess and heat to set. Lightly edge the banner with navy ink.

Cover the swirls in versamark and sprinkle with wow embossing powder, remove excess and heat to set. Add to the ornament using foam pads.


Stamp the angels in black memento ink and cover in clear embossing powder, remove the excess and heat to set. Colour using the kuretake pens and the gold gel pen. Die cut and shape the angels using the flower shaping kit and add to the card using hot glue. Add diamond stickles to the angels wings.

Thank you for getting Christmassy in July! 
X

Wednesday 4 July 2018

I totally  love this Under the Sea Collection from
Heartfelt Creations

I made an MDF wall hanging with it, love the sentiment, it makes me giggle everytime I read it
This is what I did:
Select the paper from the pad and draw around the mdf heart, cut out the shape slightly smaller than your line and edge the paper with Night of Navy ink.

Stitch running stitch along the edge of the 1” ribbon and gather up, attach the ribbon to the edge of the heart using hot glue and add the paper heart on top of the ribbon using hot glue, ensure that you leave a hole in the paper for threading the hanging ribbon.

Pull the ½” ribbon through the hanging hole and tie with a bow for hanging.

Stamp the fish in night of navy ink and cover in clear embossing powder, remove excess and heat. Colour using the kuretake water colour pens and water brush, bend to shape and allow to dry.

Stamp the sentiment, onto co odinating paper from the pad, in night of navy ink  and heat emboss the using clear powder. Cut the sentiment to size and edge with ink, layer onto slightly larger navy card and position onto the heart with hot glue.
Stamp the coral onto the paper with the navy ink and die cut.
Die cut the fish and brush with diamond stickles, allow to dry. Position the fish using hot glue and the coral afterwards using wet glue.


You will need:- 
Sweet as Honey Paper pad
HCPC-3737 Under the Sea Coral stamp set
HCD1 -797 Under The Sea Coral die set
HCPC-3740 Heartfelt Wishes
HCPC-3739 Under the Sea stamp set
HCD1-799 Under the Sea die set

MDF heart
White card
Clear embossing powder
1” & ½” Co ordinating ribbon 
Night of Navy card and ink – Stampin Up!
Diamond Stickles
Kuretake watercolour pens – Fl pink, yellow, deep blue
Needle and thread
Hot glue gun
Wet glue
I hope you like?
X


Tuesday 3 July 2018

At Easter we went on a family holiday, we did a bit of chilling.
And I took my copics!


Love the colour of her hair
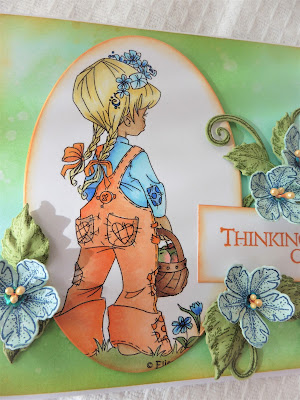
I die cut her into a circle and made a wreath of leaves for her.
Stamp the leaves with Leafy Accents stamp set , Die cut 
Then stamp your sentiment


This is the first Elizabeth Bell lass that I coloured,
love her grey hair.
the leaves were made using
and some cosmic shimmer mist
Love the little sentiment from Hunkydory For the Love of Stamps.
But mostly I'm so pleased with the way everything blends together on the gorgeous Classic Wedding Collection Papers  from Heartfelt Creations


I've really enjoyed turning this image from Elizabeth Bell into a card using my Leafy Accents stamp, die and mold from HEARTFELT CREATIONS
The petunias and stamens are also from Heartfelt Creations
I love this little image from Elizabeth Bell.
The back ground was achieved with some of Stampin Up!'s newest colours - Granny Apple Green, Balmy Blue and Mango Melody 
Thank you for looking
X


Sunday 1 July 2018


I love this Toucan        

I used some lovely paper from one of my Heartfelt collections for the background and stamped the sentiment (from for the love of stamps by Hunkydory in a really bright ink.
The flowers are made using the Tropical Paradise Collection from Heartfelt Creations - they really set off this brightly coloured toucan. I love adding dimension where I can.

Thank you for looking.
X